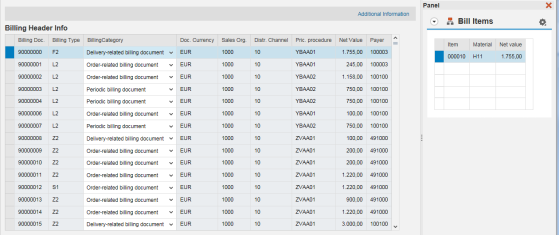
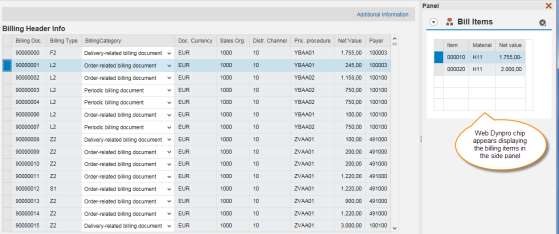
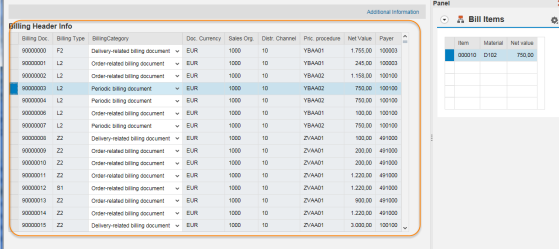
The below snap shot shows how a web dynpro chip( in right side) is embedded to the side panel of a webdynpro application.
The web dynpro application displays the billing header details and with the row selection the dependent billing items like item number, item name and the price should be displayed in the side panel through web dynpro chip integration.
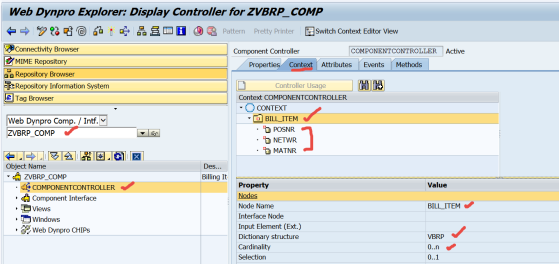
Lets' design the view that displays the billing items in the side panel.
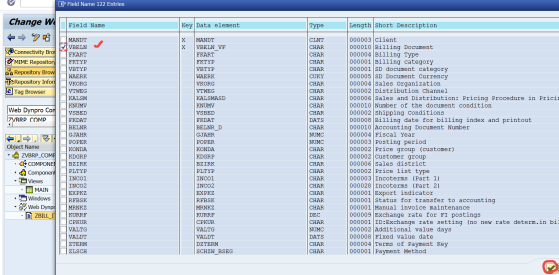
Create a web dynpro component ZVBRP_COMP. In the component controller add a node with 0.n cardinality referring to the structure VBRP and with three attributes as POSNT, NETWR & MATNR.
Add a method READ_BILL_ITEMS with the Interface box is selected and provide the below code.
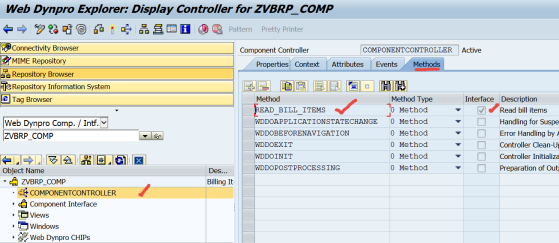
Add an importing parameter to this method of the VBRP ( the type should and must be a dictionary structure ) other wise it will not allow us to create CHIP Inports.
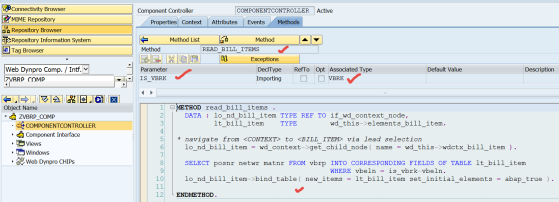
METHOD read_bill_items .
DATA : lo_nd_bill_item TYPE REF TO if_wd_context_node,
lt_bill_item TYPE wd_this->elements_bill_item.
DATA : lo_nd_bill_item TYPE REF TO if_wd_context_node,
lt_bill_item TYPE wd_this->elements_bill_item.
* navigate from <CONTEXT> to <BILL_ITEM> via lead selection
lo_nd_bill_item = wd_context->get_child_node( name = wd_this->wdctx_bill_item ).
lo_nd_bill_item = wd_context->get_child_node( name = wd_this->wdctx_bill_item ).
SELECT posnr netwr matnr FROM vbrp INTO CORRESPONDING FIELDS OF TABLE
lt_bill_item WHERE vbeln = is_vbrk-vbeln.
lo_nd_bill_item->bind_table( new_items = lt_bill_item set_initial_elements = abap_true ).
lo_nd_bill_item->bind_table( new_items = lt_bill_item set_initial_elements = abap_true ).
ENDMETHOD.
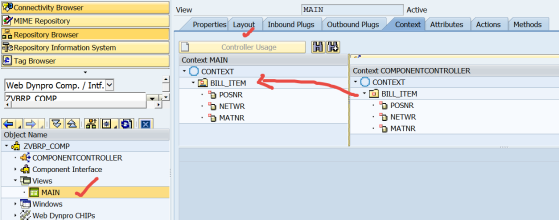
Go to the view and map the context node to the view context node.
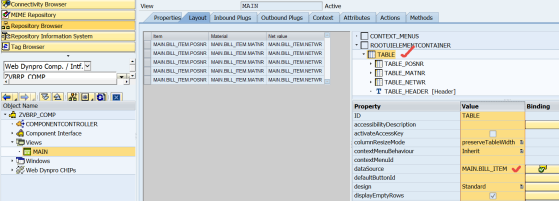
In the layout design a table and bind to to the source as the context node.
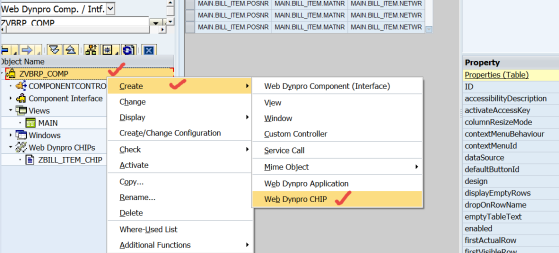
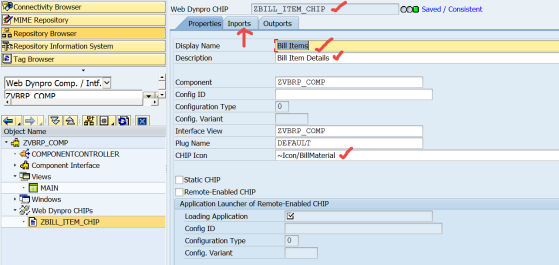
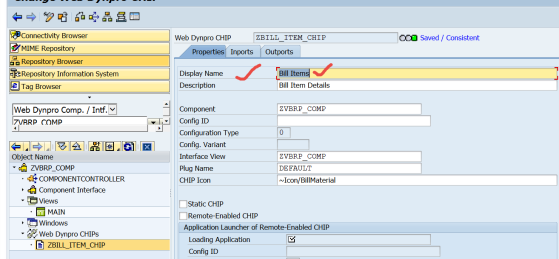
Save and activate the component and right click to create a web dynpro chip.
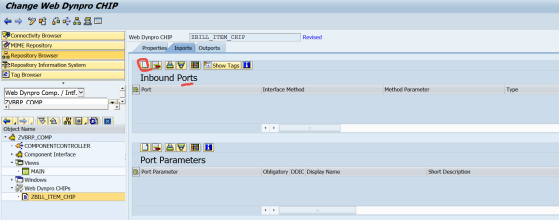
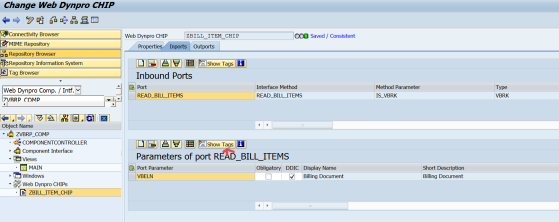
Provide a CHIP name, Display name , Description and choose a Chip Icon from F4 . Save it and click on the Inports tab.
To create an Port click on the create button.
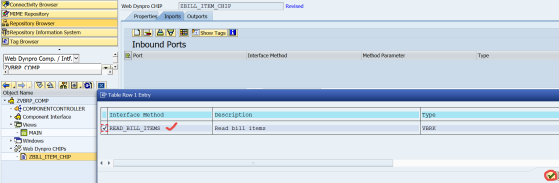
It will automatically shows the methods of the component interface . In this case we have only one . So select it and continue.
Now for the port we have to define the parameters. Click on the parameter create button.
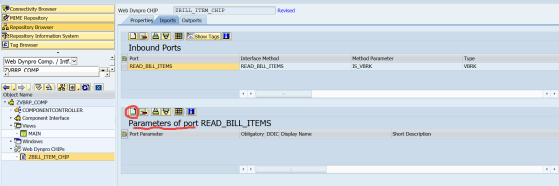
The port method needs only the VBELN- bill doc number to get the item details. So select only one field VBELN and continue.
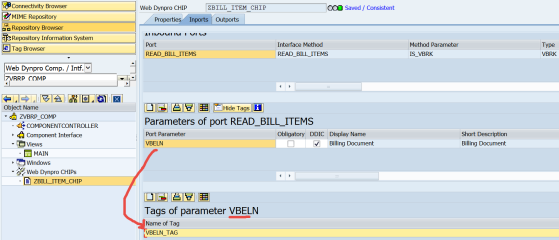
For the parameter we need to define tag. Click the icon show tag.
Create a tag with name VBELN_TAG.
we finished the creation of a web dynpro component with a chip.
Now we have a create another web dynpro application that displays the billing header table and integration with the Chip.
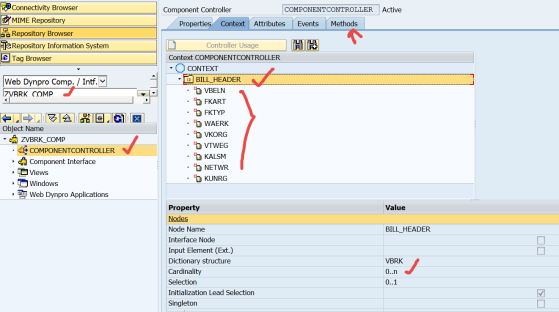
Create a web dynpro component and in the component controller add a context node with cardinality 0..n and referring to the structure- VBRK with some field attributes as shown.
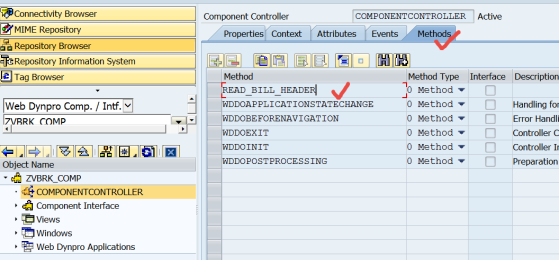
Go to the Methods and add a new method READ_BILL_HEADER & put the below code.
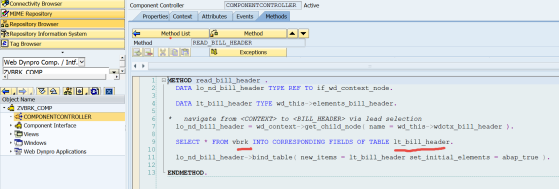
METHOD read_bill_header .
DATA lo_nd_bill_header TYPE REF TO if_wd_context_node.
DATA lo_nd_bill_header TYPE REF TO if_wd_context_node.
DATA lt_bill_header TYPE wd_this->elements_bill_header.
* navigate from <CONTEXT> to <BILL_HEADER> via lead selection
lo_nd_bill_header = wd_context->get_child_node( name = wd_this->wdctx_bill_header ).
lo_nd_bill_header = wd_context->get_child_node( name = wd_this->wdctx_bill_header ).
SELECT * FROM vbrk INTO CORRESPONDING FIELDS OF TABLE lt_bill_header.
lo_nd_bill_header->bind_table( new_items = lt_bill_header set_initial_elements = abap_true ).
ENDMETHOD.
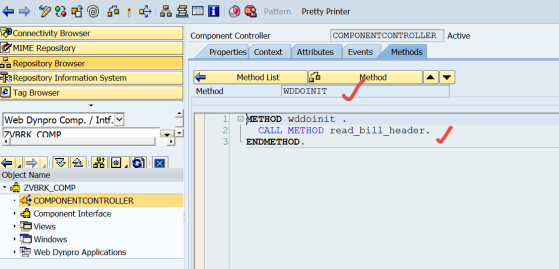
Call the method from the INIT method of the component controller.
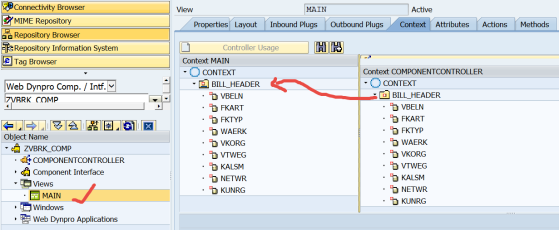
Go to the view and map the context node.
In the Layout, first add a PAGEHEADER UI element and named it as PAGE_HEADER ( The ID should be PAGE_HEADER ).
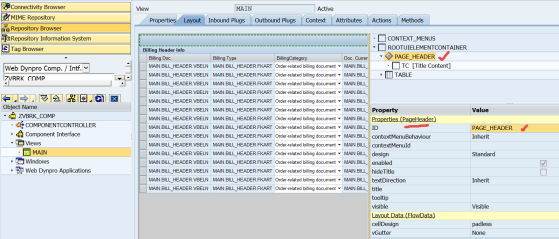
In the page header add a Transparent Container. [ this transparent container will automatically show a link when the application is launched]

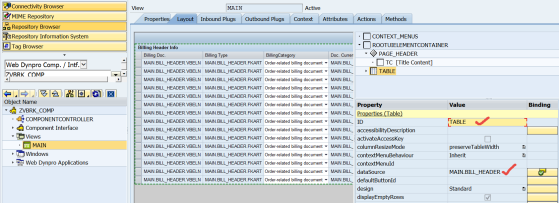
Then design a table and map to the context node as the data source.
Now go to the attribute and add an attribute to the interface IF_WD_SIDE_PANEL_API.

Go to the INIT method of the view and here we have to initialize the side panel to open the CHIP UI, So put the below code. while initializing the side panel give a Action as 'SIDE_PANEL'
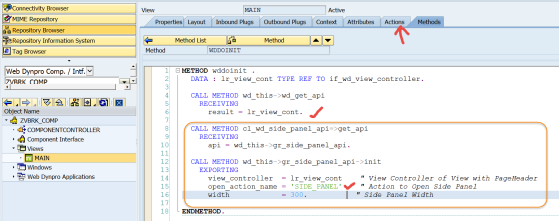
METHOD wddoinit .
DATA : lr_view_cont TYPE REF TO if_wd_view_controller.
DATA : lr_view_cont TYPE REF TO if_wd_view_controller.
CALL METHOD wd_this->wd_get_api
RECEIVING
result = lr_view_cont.
RECEIVING
result = lr_view_cont.
CALL METHOD cl_wd_side_panel_api=>get_api
RECEIVING
api = wd_this->gr_side_panel_api.
RECEIVING
api = wd_this->gr_side_panel_api.
CALL METHOD wd_this->gr_side_panel_api->init
EXPORTING
view_controller = lr_view_cont " View Controller of View with PageHeader
open_action_name = 'SIDE_PANEL' " Action to Open Side Panel
width = 300. " Side Panel Width
EXPORTING
view_controller = lr_view_cont " View Controller of View with PageHeader
open_action_name = 'SIDE_PANEL' " Action to Open Side Panel
width = 300. " Side Panel Width
ENDMETHOD.
Now define a view action as 'SIDE_PANEL' and double click on the method.
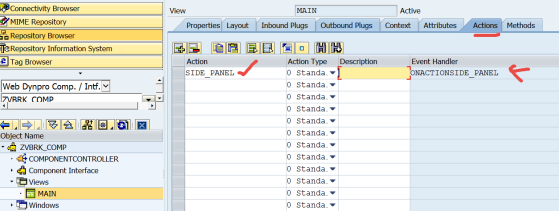
Put the below code to open the side panel.
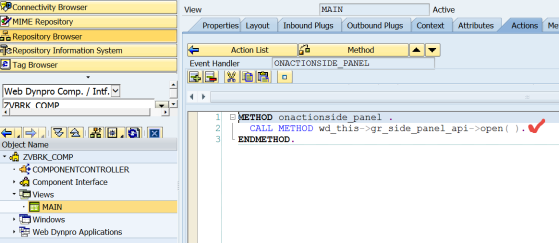
METHOD onactionside_panel .
CALL METHOD wd_this->gr_side_panel_api->open( ).
ENDMETHOD.
CALL METHOD wd_this->gr_side_panel_api->open( ).
ENDMETHOD.
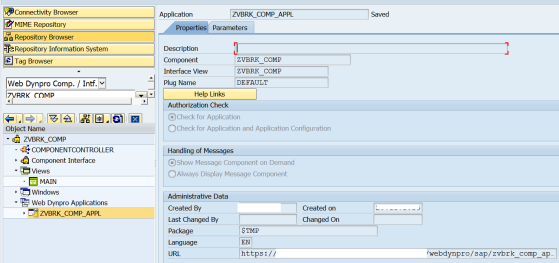
Create an application.
launch the application from the menu path in Admin Mode to integrate the application to the Chip.
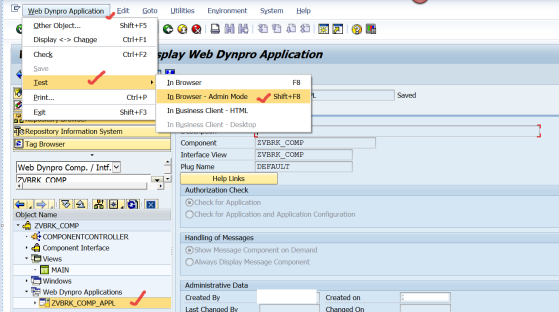
The below application screen appears, If it is open in administrative mode, in the url you can see additional parameter is added as [ &sap-config-mode=X ].
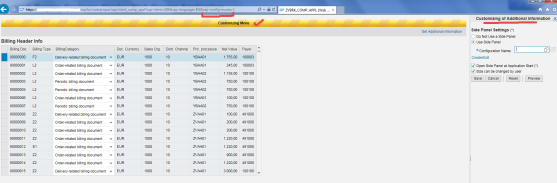
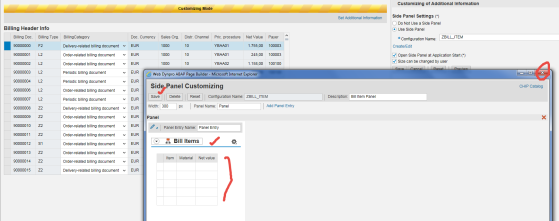
Provide a side panel configuration name and save it and then click on the Create/Edit link.

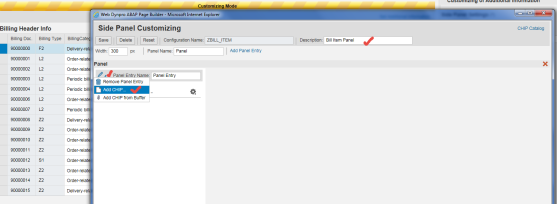
Provide description and form the change option select Add Chip button.
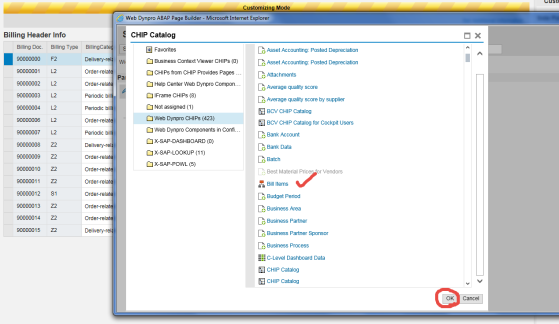
Search for the chip.
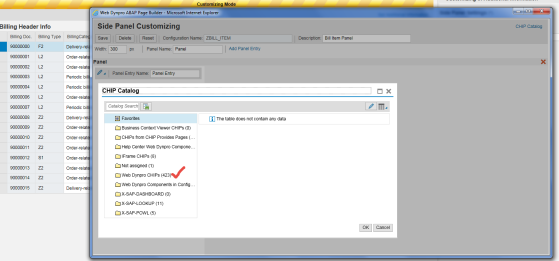
Select the above created chip as Bill Items
Save and close the window.
From the billing header table , right click on the Billing Doc column and navigate along Tag- Maintain Tag

provide a tag name . It should be same as it is defined in the web dynpro chip for automatic wiring. click on add.
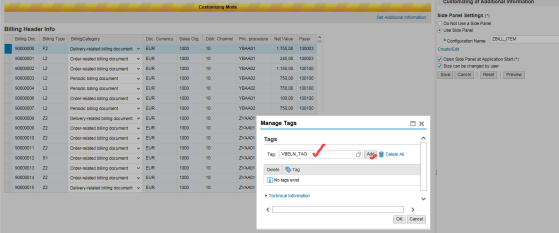
Click on OK.

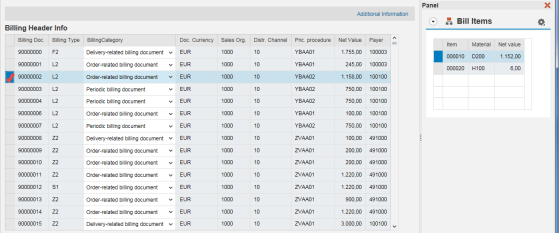
Now launch the application.

So here the chip is displayed in the side panel and displays all the items of the selected billing doc.