Scenario: This post describes the process of creating a table in Web dynpro ABAP.
Step1. Go to Transaction- SE80.

Step2. Provide Web dynpro component name and hit Enter key from the key board. Select Yes from the Popup to create a new web dynpro component.

Step3. Provide a description and provide a appropriate window and a view name. Click on Continue button at last.

Step4. Save as local object.

Step5. The status is inactive. Click on Activate button to make it active.

Step6. Click on YES button to activate all.

Step7. Click on the Change button. Expand the View and double click on the view name. Go to the Context Tab.

Step8. Right click on the Context, navigate along the highlighted path to Create a Node.

Step9. Provide a Node name. Select dictionary structure VBAK as we are going to show Sales order header information. Select Cardinality as 0..N . At last click on the Tab Add Attributes from Structure.

Step10. Select some of the fields from the pop up screen as needed to display in the View and at last clckc on continue button.

Step11. The context Node is designed with some fields. Click on the Activate button to make it active.

Step12. Now go to the Tab layout and select the ROOTUIELEMENTCONTAINER from the right side. Select the layout as Matrix Layout.

Step13. Right click on the ROOTUIELEMENTCONTAINER and select insert element option.

Step14. Provide a ID name (any) and typ as Table and click on teh continue button.

Step15.Click on the Caption option

Step16. Provide some text in the Text and hit the Enter Key from keyboard so the Text appears on the View .

Step17. Select the TAB under ROOTUIELEMENTCONTAINER and click on the DATASOURCE button.
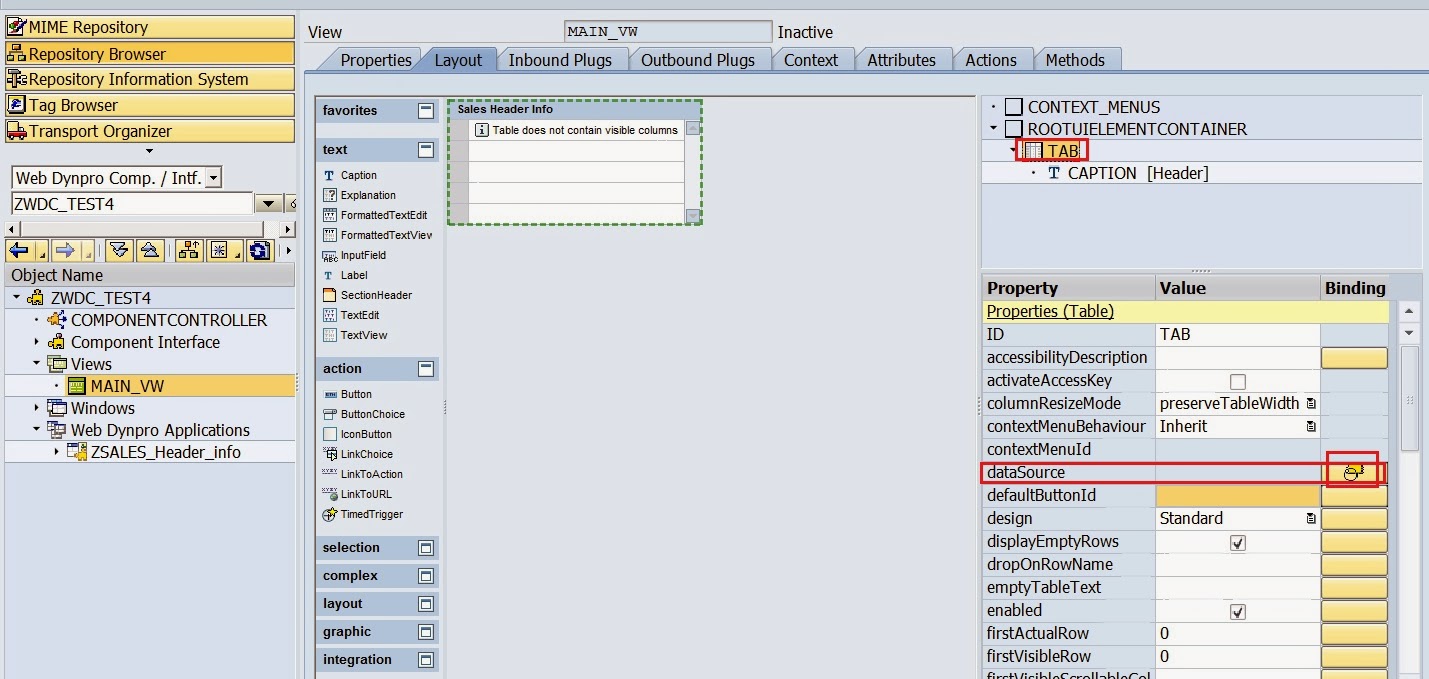
Step18.Select the Node SALES_HDR and click on continue button.

Step19. Change the Visible row count as per appropriate.

Step20. Right click on the Tab name and from the option choose 'Create Binding'.

Step21. Select Cell Editor as Text View and Under binding select the check for each fields and at last click on the Continue button.

Step22. The view design appears like below.

Step23. Go to the Attributes tab. The web dynpro framework provides some attributes by default. WD_THIS and WD_CONTEXT.

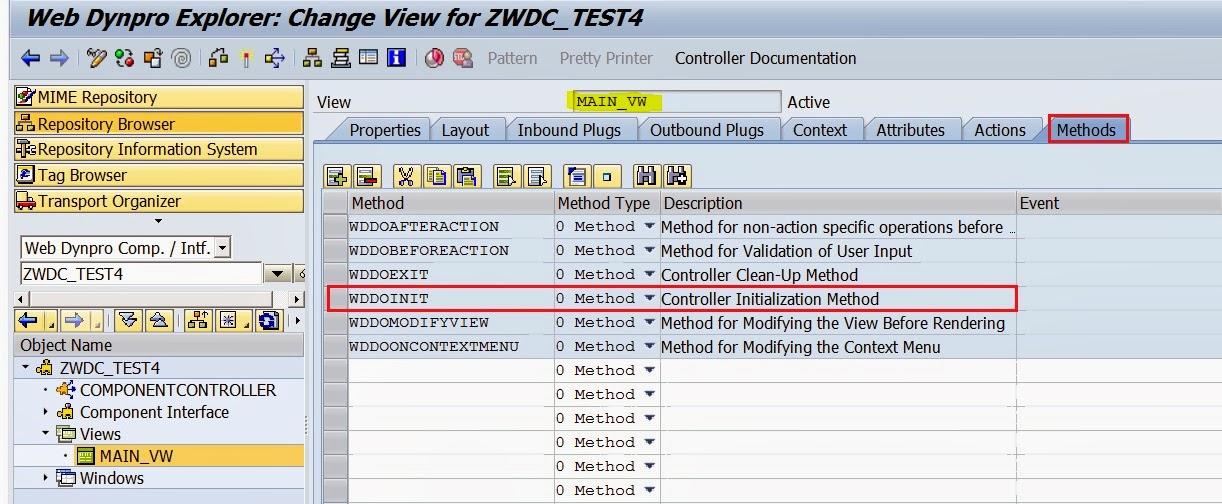
Step24. Go to the Methods tab and double click on the WDDOINIT method.
Step25. Provide the below code to get the data from the database table to the internal table and binding the internal table data to the view context node. Activate it.

Step26. Now double click on the component name and right click on it and follow the navigation to create a application.
Step27. Provide the application name and description and click on Continue button.

Step28. The application is created with status new. Now save it.

Step29. Click on the test button of the application..

Step30. The output is appears as given below.

_______________________________________________________________
Step1. Go to Transaction- SE80.

Step2. Provide Web dynpro component name and hit Enter key from the key board. Select Yes from the Popup to create a new web dynpro component.
Step3. Provide a description and provide a appropriate window and a view name. Click on Continue button at last.
Step4. Save as local object.
Step5. The status is inactive. Click on Activate button to make it active.
Step6. Click on YES button to activate all.
Step7. Click on the Change button. Expand the View and double click on the view name. Go to the Context Tab.
Step8. Right click on the Context, navigate along the highlighted path to Create a Node.
Step9. Provide a Node name. Select dictionary structure VBAK as we are going to show Sales order header information. Select Cardinality as 0..N . At last click on the Tab Add Attributes from Structure.
Step10. Select some of the fields from the pop up screen as needed to display in the View and at last clckc on continue button.
Step11. The context Node is designed with some fields. Click on the Activate button to make it active.
Step12. Now go to the Tab layout and select the ROOTUIELEMENTCONTAINER from the right side. Select the layout as Matrix Layout.
Step13. Right click on the ROOTUIELEMENTCONTAINER and select insert element option.
Step14. Provide a ID name (any) and typ as Table and click on teh continue button.
Step15.Click on the Caption option
Step16. Provide some text in the Text and hit the Enter Key from keyboard so the Text appears on the View .
Step17. Select the TAB under ROOTUIELEMENTCONTAINER and click on the DATASOURCE button.
Step18.Select the Node SALES_HDR and click on continue button.
Step19. Change the Visible row count as per appropriate.
Step20. Right click on the Tab name and from the option choose 'Create Binding'.
Step21. Select Cell Editor as Text View and Under binding select the check for each fields and at last click on the Continue button.
Step22. The view design appears like below.
Step23. Go to the Attributes tab. The web dynpro framework provides some attributes by default. WD_THIS and WD_CONTEXT.
Step24. Go to the Methods tab and double click on the WDDOINIT method.
Step25. Provide the below code to get the data from the database table to the internal table and binding the internal table data to the view context node. Activate it.
Step26. Now double click on the component name and right click on it and follow the navigation to create a application.
Step27. Provide the application name and description and click on Continue button.
Step28. The application is created with status new. Now save it.
Step29. Click on the test button of the application..
Step30. The output is appears as given below.
_______________________________________________________________
No comments:
Post a Comment