The link: FPM OVP Application -Integrating Header LIST UIBB and ITEMListUIBB provides steps to display list UIBBs.
Test the application .

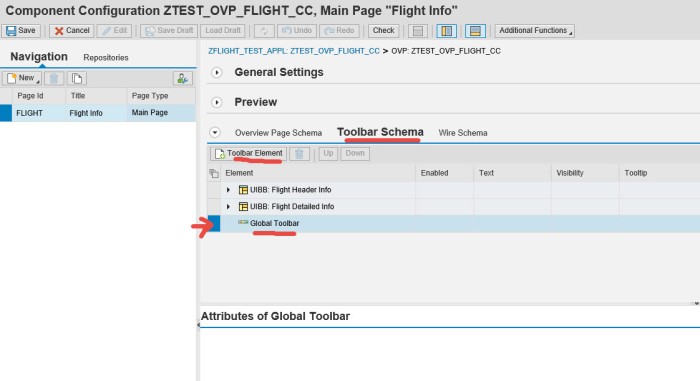
Now we have to add some button on the global toolbar (area marked in red color).

Select the application configuration and click on Display configuration button.
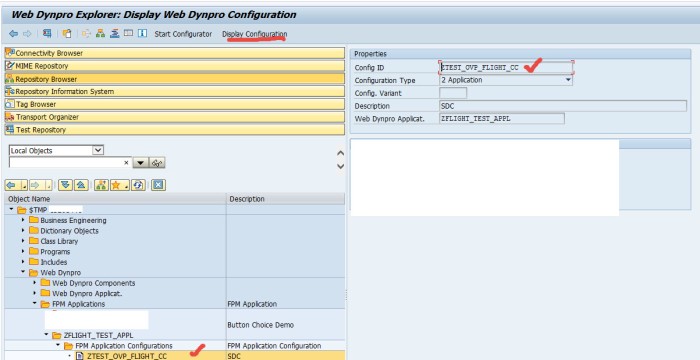
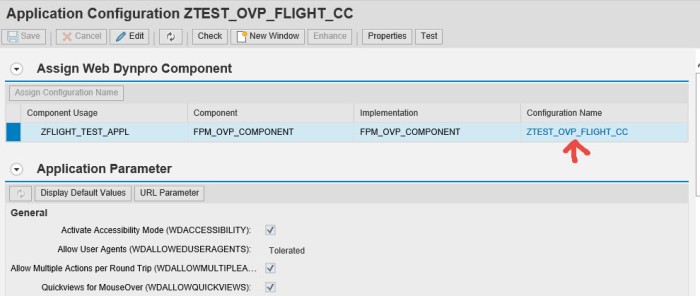
Click on the link on the configuration name.
Click the Toolbar schema, then click the EDIT button, then select Global toolbar, then click on the Create Toolbar element button.
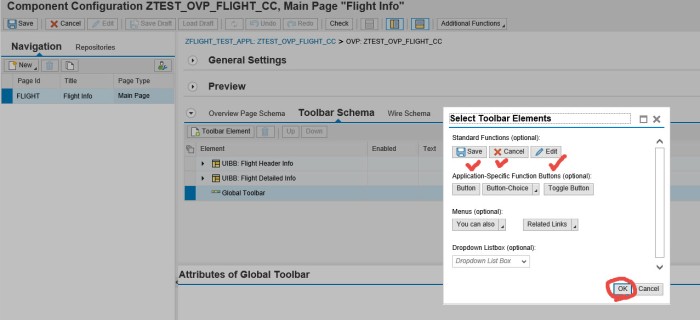
Add SAVE< CANCEL and EDIT button.
Save it.

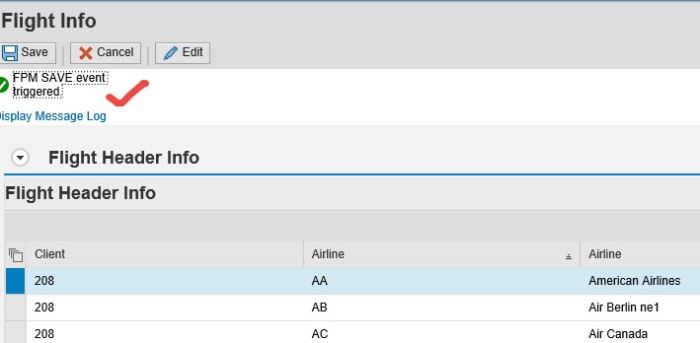
Now test the application and here the buttons available in the global toolbar area of the application.

Next task is to respond to the button click(s). Now figure out the application controller class.
Expand the general setting in the application configuration. From Floorplan setting-> Application controller settings.

So here we have the feeder class.
The message class.

Go to the After_process_event method of the application controller class.
Put the below code as shown below.

test the application and click each button and the corresponding action is triggered and the appropriate message text is displayed.


--------------------------------------------------------------------------------------------------------------------------
No comments:
Post a Comment